
Why Your Streaming Picture Looks Worse Than the Store Demo
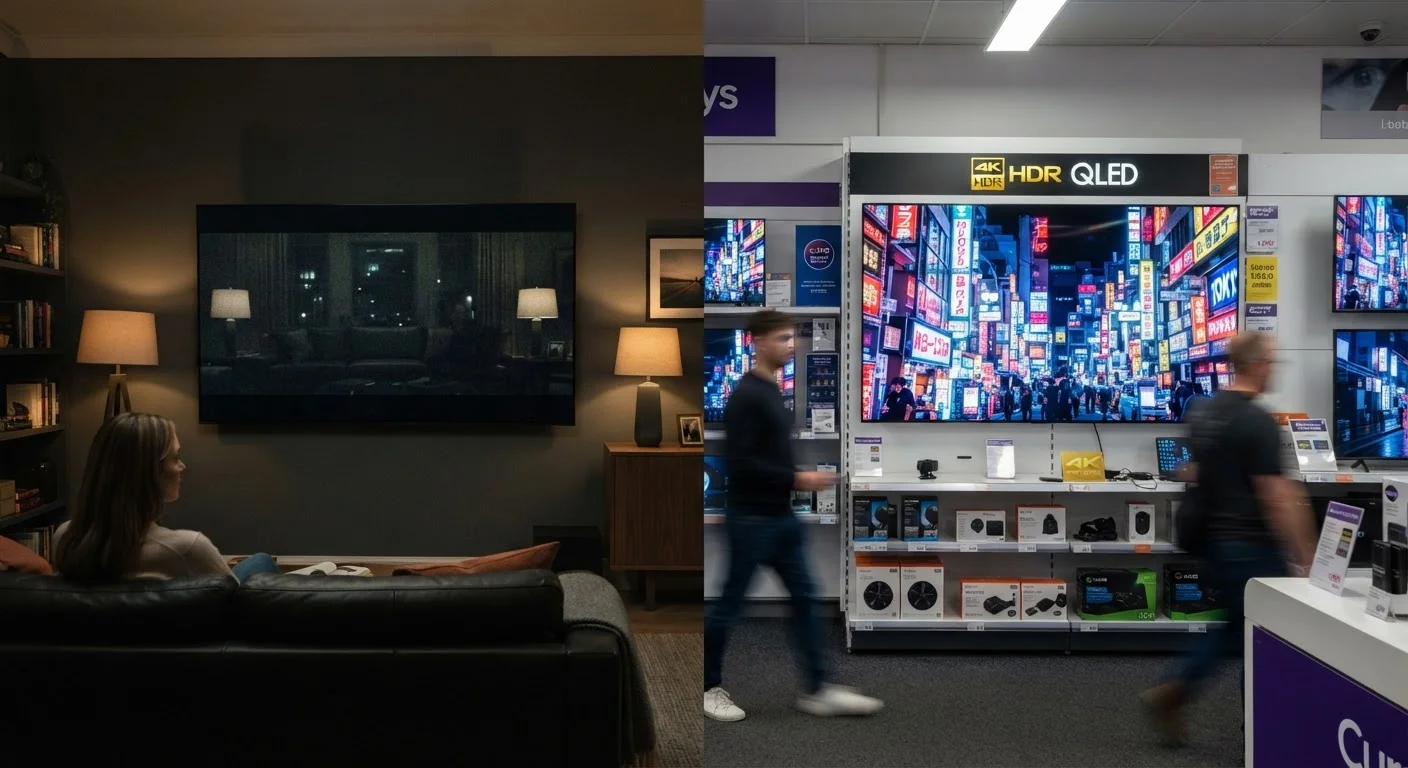
Photo credit: ProximityFinds.com | One-stop Reading Source
In this article
Showroom TVs are calibrated specifically to impress. Learn why your at-home picture differs and what display settings are worth adjusting after setup.
Key Takeaways
- Retail TVs run in 'Vivid' or 'Dynamic' mode designed for bright showrooms, not home viewing.
- Streaming services compress video data, which reduces picture quality compared to physical media or store demos.
- Adjusting your TV's picture mode and disabling motion smoothing can significantly improve image quality.
- Room lighting conditions have a measurable impact on how contrast and color appear on screen.
- HDR content requires proper TV settings and sufficient streaming bandwidth to render correctly.
The Showroom Is a Controlled Illusion
Walk into any electronics retailer and the TVs look stunning - colors pop, blacks are deep, motion is razor-sharp. That effect is entirely intentional and almost impossible to replicate at home without understanding why it happens.
Retail stores set every display to its most aggressive picture preset, often called Vivid or Dynamic mode. This cranks brightness to near-maximum, boosts color saturation beyond what any content creator intended, and sharpens edges artificially. Under the store's bright fluorescent overhead lighting, this looks impressive. In a normally lit living room, the same settings produce an overblown, unnatural image.
Additionally, many showroom displays run demo loops - purpose-built video files with extreme contrast, saturated colors, and close-up textures specifically engineered to showcase hardware capability. That content bears little resemblance to actual streaming video. Understanding these factors is the first step toward closing the gap between what you saw in the store and what you see at home.
Common Mistakes That Degrade Your Picture
Most picture quality problems at home trace back to a handful of avoidable errors. Knowing what to look for - and what to change - makes a real difference.
Leaving the TV in its factory 'Vivid' or 'Dynamic' picture preset after setup.
Why it happens: TVs ship in aggressive modes that look striking on a retail shelf under bright lights. Most owners never revisit picture settings once the TV is mounted and connected.
Assuming a poor picture is caused by the TV when the streaming bitrate is the real bottleneck.
Why it happens: Internet speed tests often measure peak throughput, but actual streaming bitrate depends on congestion, router placement, and service-tier limits - none of which are visible to the viewer.
Leaving motion smoothing enabled on films and scripted TV content.
Why it happens: Motion smoothing is on by default on most TVs and is rarely explained in plain terms during setup. Many viewers don't connect the unnatural look to a specific setting.
Not enabling HDR at the input or source-device level, so HDR content plays in standard range.
Why it happens: HDR requires correct settings at multiple points in the signal chain - the TV input, the streaming device's output settings, and the app's playback quality. One misconfigured step disables the whole chain.
Ignoring room lighting conditions and how they affect perceived picture quality.
Why it happens: Viewers focus on the screen itself but rarely account for ambient light sources - lamps, windows, and ceiling lights that wash out contrast and shift perceived color temperature.
For a deeper understanding of the specs behind these settings, the TV spec glossary for normal people explains terms like HDR10, Dolby Vision, and refresh rate in plain language.
What Streaming Compression Actually Does to Your Picture
15-25 Mbps
Typical bitrate for a 4K HDR stream
Most major streaming platforms deliver 4K HDR content in this range, well below the 80-100 Mbps bitrates found on 4K Blu-ray discs.
~82%
US households with at least one streaming subscription
According to Leichtman Research Group data, the majority of US TV households subscribe to at least one streaming video service.
Streaming video is not a raw feed - it is heavily compressed data delivered over your internet connection. Services encode video using algorithms that reduce file size by discarding visual information the human eye theoretically won't notice. At lower bitrates, that compromise becomes visible: fine detail in textures softens, dark scenes develop a murky, blocky appearance called compression artifacts, and fast motion can blur or stutter.
The bitrate a service delivers depends on your internet plan, network congestion, and the service's own infrastructure. A nominal 4K HDR stream may look appreciably different on a 25 Mbps connection versus a 50 Mbps one. Some services also cap bitrate on certain subscription tiers, meaning the highest visual quality may require a higher-tier plan - something worth checking in your account settings rather than assuming it's your TV at fault.
Physical media - Blu-ray discs - carry far higher bitrates than any streaming service currently offers, which is why disc playback still looks noticeably better than streaming on a properly calibrated display. The store demo you admired was almost certainly not streaming content.
Settings Worth Adjusting Right Now
You don't need professional calibration equipment to improve your picture meaningfully. A few targeted changes produce most of the benefit.
- Switch the picture mode. Change from Vivid or Dynamic to Cinema, Movie, or Filmmaker Mode if your TV offers it. These modes target color accuracy and are calibrated closer to professional display standards.
- Disable motion smoothing. Often labeled Motion Flow, TruMotion, or Auto Motion Plus depending on the manufacturer, this processing creates the so-called "soap opera effect" - film content looks unnervingly like cheap video. Turn it off or set it to minimum.
- Match your HDR settings to your content. If your TV supports HDR but you haven't enabled it in both the TV's input settings and your streaming app's playback quality options, you're watching HDR content rendered in standard dynamic range.
- Adjust backlight for your room. A high backlight level that looks fine during the day will cause eye fatigue and wash out dark scenes at night. Reduce it for evening viewing.
If you're building out a full home entertainment setup, setting up a home theater system without hiring someone covers HDMI configuration, source device settings, and audio calibration as a practical complement to display tuning.
Avoid Over-Adjusting Sharpness and Color
It's tempting to manually increase sharpness or push color saturation after switching picture modes, but these controls add artificial edge enhancement and unnatural hues that degrade accuracy. In most Cinema or Movie presets, sharpness is best left at or near zero - the TV is not actually removing detail, it's simply not adding artificial edge enhancement. Color and tint adjustments should only be made if you have a calibration reference, or left at their defaults.

Author
Technology Editorial Team
Technology Editorial Team is the collective byline for our editorial team and contributor network. Articles published under this byline or an editorial pen name are researched, written, and reviewed according to our editorial standards for clarity, consistency, and independence before publication.
View all articles →