
What a Travel Emergency Plan Actually Looks Like
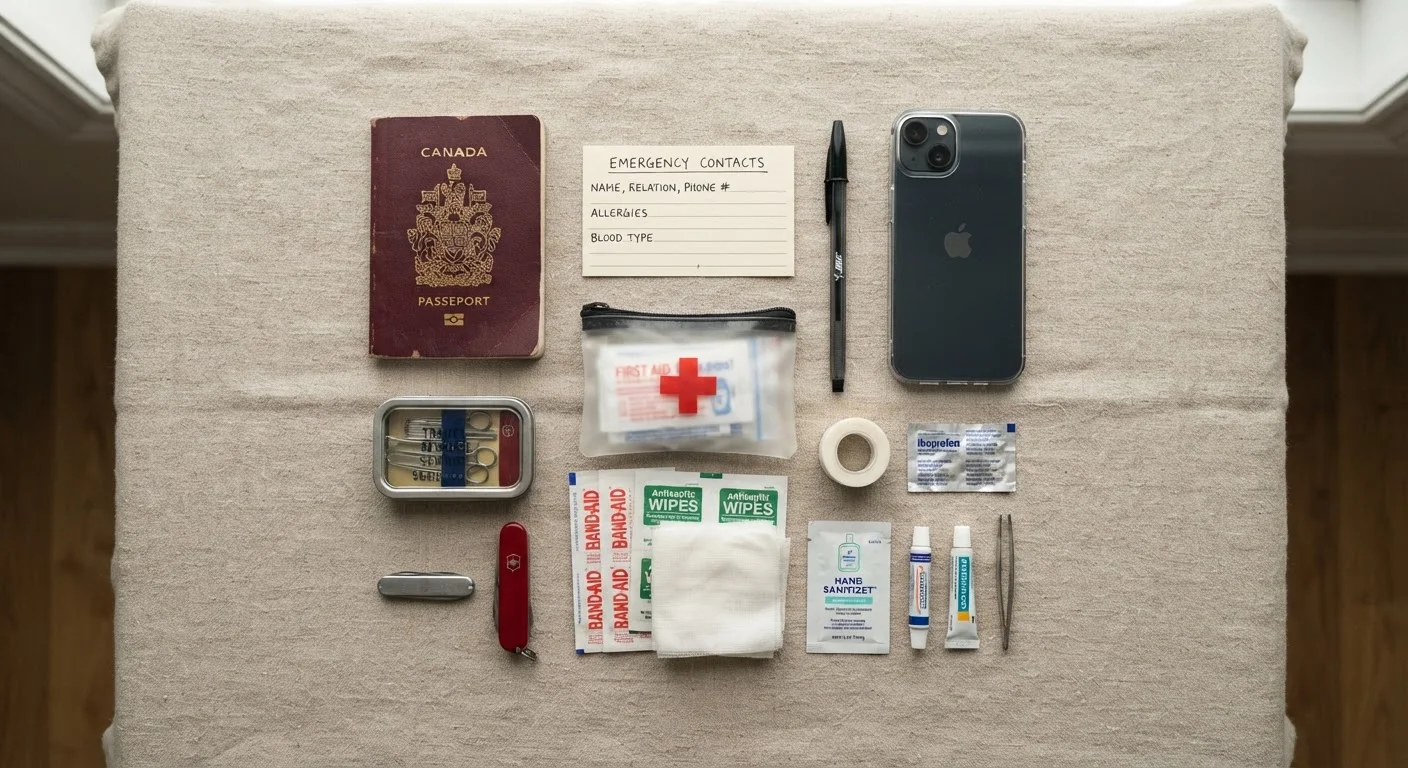
Photo credit: ProximityFinds.com | One-stop Reading Source
In this article
Lost passport, medical issue, cancelled flight—emergencies abroad are stressful by definition. A simple plan made in advance makes a real difference.
Key Takeaways
- A travel emergency plan takes under an hour to build but can save days of chaos abroad.
- Storing digital and physical copies of key documents is one of the most important steps you can take.
- Knowing your country's U.S. Embassy contact before you land is essential - not optional.
- Travel insurance can cover medical evacuation costs that easily reach tens of thousands of dollars.
- A single trusted contact at home who knows your itinerary is your most underrated safety net.
Why Most Travelers Skip This - And Why That's a Mistake
Travel emergencies feel like something that happens to other people - until they happen to you. A delayed connection that snowballs into a missed flight, a pickpocket in a busy market, or an unexpected illness in a country where you don't speak the language: these situations become exponentially more stressful when you have no plan in place.
The good news? A solid travel emergency plan doesn't require special expertise or expensive tools. It requires about 30 to 60 minutes of thoughtful preparation before you leave. The steps below translate that preparation into a concrete, repeatable routine for any international trip.
If you're heading abroad for the first time, our guide for first-time international travelers covers the broader pre-departure picture. This article zooms in specifically on emergency preparedness.
Don't Wait Until You're Abroad to Plan
Emergency plans only work when built before a crisis hits. Once you've lost your passport or ended up in an urgent care clinic overseas, you're already operating under stress and limited resources. Take 30-60 minutes before departure to put your plan in writing. Your future self will thank you.
What You'll Need Before You Start
Gather these resources before working through the steps below. Having everything in one place makes the process faster and ensures nothing gets missed.
What you will need
STEP Enrollment (Smart Traveler Enrollment Program)
Registers your trip with the U.S. Embassy so they can contact you in a crisis or natural disaster.
Travel Insurance Policy
Covers medical emergencies, evacuation, trip cancellation, and lost document assistance depending on the plan.
Cloud Storage or Secure Email
Store digital copies of your passport, visa, insurance cards, and itinerary so they're accessible from any device.
Physical Copy Folder
A small paper folder kept in your carry-on with printed copies of critical documents as a backup.
Unlocked Phone or Local SIM Plan
Ensures you can make calls and access data in the destination country without relying on hotel Wi-Fi.
Building Your Emergency Plan: Step by Step
Work through each step below before your departure date - ideally a week out, so you have time to print documents, set up your phone plan, and brief your home contact without rushing.
Register with the U.S. Embassy via STEP
Before you fly, enroll in the Smart Traveler Enrollment Program (STEP) at travel.state.gov. This free service lets the U.S. Embassy know you're in the country and allows them to reach you during a regional crisis, natural disaster, or civil unrest. It also helps your family contact you through official channels if they can't reach you directly. Note your destination Embassy's phone number separately - Embassy phone lines and STEP alerts are different resources.
Back Up Your Critical Documents
Make both digital and physical copies of your passport photo page, visa, travel insurance card, emergency contact list, and accommodation addresses. Upload digital copies to a cloud folder or email them to yourself so they're reachable from any device. Pack a printed set in your carry-on, kept separate from your originals. If your wallet and phone are both stolen, a printed copy in your bag can be the difference between hours and days lost.
Designate a Trusted Home Contact
Choose one person at home - a family member or close friend - who has a copy of your full itinerary, passport number, travel insurance policy number, and the contact details for your destination Embassy. This person is your coordination hub if you go out of contact or need someone stateside to make calls on your behalf. Share your accommodation addresses, not just hotel names. Brief them on what to do and who to call if they don't hear from you.
Know Your Insurance Coverage and Claims Process
Pull out your travel insurance policy documents before you leave and identify: the 24/7 emergency assistance phone number, what counts as a covered medical event, and how to initiate a claim. Some policies require you to call before seeking non-emergency care to authorize coverage. Medical evacuation alone can cost tens of thousands of dollars without coverage - knowing your policy in advance prevents costly surprises. For a broader look at what travel insurance actually does, see our guide to travel insurance.
Plan for a Lost or Stolen Passport
A lost passport is one of the most common international emergencies. Know in advance: your nearest U.S. Embassy or Consulate address and hours, the documents you'll need to replace a passport (typically your backup copy, a passport photo, and a police report for theft), and roughly how long emergency passport processing takes in your destination country. In many major cities, emergency passports can be issued within one to two business days - but only if you have the documentation to support the application.
Prepare a Simple Written Emergency Card
On a single index card or printed sheet, write: your full name and blood type, any critical medical conditions or allergies, your travel insurance policy number and emergency phone line, your home contact's name and phone number, and your destination Embassy's phone number. Keep this card in your jacket or a separate pocket from your wallet. In a medical emergency where you can't speak - or speak the local language - this card gives first responders and hospital staff critical information immediately.
Keep a Physical Backup Card
Write your emergency contacts, insurance policy number, and Embassy phone number on a small index card and store it separately from your phone and wallet. If your phone dies and your bag is stolen, a paper card in your jacket pocket could be the fastest path to help.
For a full pre-departure checklist that integrates these emergency steps alongside visa applications, health prep, and travel documentation, see the International Travel Prep checklist. This emergency plan is also one component of the broader complete international travel planning roadmap.
U.S. Health Insurance Rarely Works Overseas
Most American health plans - including Medicare - provide little to no coverage outside the United States. Don't assume your domestic insurance will cover an emergency room visit or hospital stay abroad. Review your policy carefully and consider the value of travel medical insurance before any international trip. See our guide to health care abroad for what to expect.
After the Emergency: Getting Back on Track
Once the immediate crisis is managed - passport replaced, claim filed, flight rebooked - document everything. Keep receipts, incident reports, and any written correspondence with airlines, hospitals, or local authorities. These records are essential for insurance reimbursement and, in some cases, for disputing charges on your credit card statement.
Reach out to your airline's customer service line for rebooking assistance; many carriers have dedicated support for disrupted travelers. If a medical issue forces an extended stay, your insurance's emergency assistance line can help coordinate accommodation and communicate with your insurer back home.
Explore the International Travel hub for destination guides, safety tips, and more practical planning resources for your next trip abroad.

Author
Travel Editorial Team
Travel Editorial Team is the collective byline for our editorial team and contributor network. Articles published under this byline or an editorial pen name are researched, written, and reviewed according to our editorial standards for clarity, consistency, and independence before publication.
View all articles →